Installing a USB outlet in your home is an excellent way to modernize your space and simplify your charging needs. If you’re wondering how to install USB outlet, you’ll be happy to know this is a straightforward project that most DIY homeowners can tackle with minimal tools and a little bit of patience. Whether you’re tired of misplacing bulky adapters or you want to future-proof your home, swapping a traditional wall outlet for one with USB ports is a practical solution.
Here’s what we’ll cover in this guide:
- What tools you’ll need to complete the project safely.
- A step-by-step process for installing your USB outlet.
- Common issues and troubleshooting tips.
Tools and Materials You’ll Need for the Job
Before we jump into the installation process, make sure you have everything you need. These items will help your project go smoothly:
Tools:
- Screwdriver (Phillips and flathead)
- Wire strippers
- Voltage tester
- Needle-nose pliers
Materials:
- USB outlet (ensure it matches the amperage of your old outlet)
- Wire nuts
- Electrical tape
- Faceplate (optional if your current one doesn’t fit)
⚠️ Safety Tip: Whenever you’re working with electricity, it’s crucial to take proper precautions. Make sure the power to the circuit is off before handling any wires.
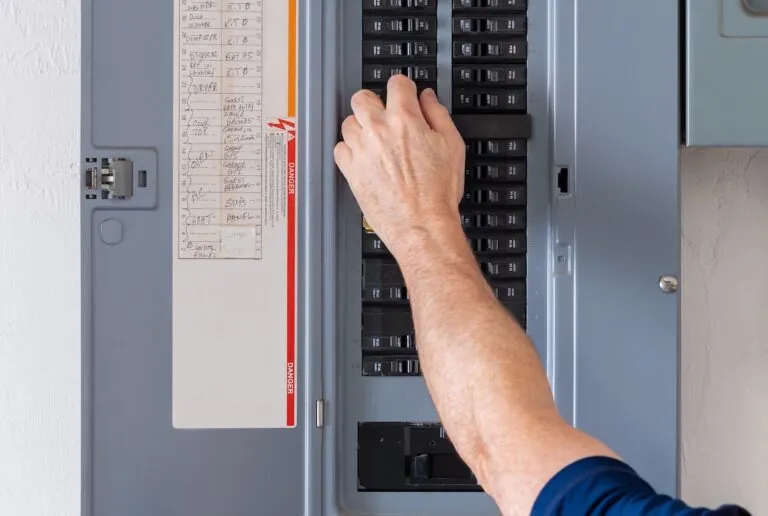
Step 1. Turn Off the Power
The first and most critical step when learning how to install a USB outlet is ensuring your safety.
- Locate the Circuit Breaker: Head to your home’s electric panel to find the circuit breaker corresponding to the outlet you’ll be working on. Flip it completely off.
- Double-Check the Power is Off: Using a voltage tester, check the outlet to confirm there’s no electricity flowing. Simply place the tester into the existing outlet; if it lights up or beeps, the circuit is live, and you need to re-check your breaker. DO NOT proceed until you’re sure there’s no current.
Step 2. Remove the Existing Outlet
Once power is shut off, you’re ready to remove the old wall outlet.

- Unscrew the Faceplate: Using a screwdriver, unscrew the faceplate to expose the old outlet. Place the screws in a small container so they don’t get lost.
- Disconnect the Outlet: Carefully unscrew and pull the outlet out from the wall box. You’ll see it connected by three wires:
- Hot Wire (typically black or red)
- Neutral Wire (usually white)
- Ground Wire (green or bare copper)
📸 Take a photo or label them to remember which one connects where—this will come in handy later.
- Disconnect the Wires: Using a screwdriver or needle-nose pliers, unfasten the wires from the old outlet. Some outlets have push-in connectors instead of screws; if that’s the case, refer to your manufacturer’s instructions for how to release the wires.
⭐️ Set the old outlet aside once it’s disconnected.
Step 3. Install the New USB Outlet
Now it’s time to install the USB wall outlet. Here’s how to do it in just a few steps:
- Look for the Markings: Your new USB outlet will typically have “Hot” and “Neutral” labels to guide you. Double-check the markings before connecting anything.
- Connect the Wires to the USB Outlet
- Attach the Hot Wire to the screw labeled “Hot” (usually a brass or darker screw).
- Attach the Neutral Wire to the screw labeled “Neutral” (usually a silver or lighter screw).
- Fasten the Ground Wire to the green ground screw.
- Use your screwdriver to tighten each connection securely. Loose connections can cause electrical issues, so ensure everything is snug.
- Tuck the Wires Back: Carefully fold the wires back into the electrical box so everything fits neatly behind the outlet.

Step 4. Secure and Assemble the Outlet
Once the wiring is complete, it’s time to secure everything in place.
- Mount the USB Outlet: Push the outlet into the electrical box and align the screw holes. Fasten it with the screws provided.
- Attach the Faceplate: Align and screw the faceplate onto the outlet for a polished finish. If your old faceplate doesn’t fit, swap it for a new one designed for USB outlets.
Step 5. Restore Power and Test
It’s the moment of truth—will your outlet work as expected? Here’s how to find out:
- Turn the Power Back On: Return to your circuit breaker panel and flip the breaker back on.
- Test Both the USB Ports and Standard Outlets: Plug in a device with a USB cable and check that it charges. Also, test the traditional plug outlets to ensure they’re working correctly.
If everything powers up as it should, congratulations! You’ve successfully installed your USB outlet.
Troubleshooting 3 Common Issues
Sometimes, issues may arise during or after your installation. Here are a few common problems and how to address them:
⚡️ Outlet Isn’t Getting Power
- Double-check the wiring connections, ensuring none are loose.
- Verify the circuit breaker is fully turned on.
❌ USB Ports Aren’t Working
- Ensure the USB outlet is compatible with the amperage of your circuit.
- Check for loose connections in the outlet’s wiring.
🔥 Outlet Feels Warm
- A slightly warm outlet is normal, but if it’s excessively hot, cut the power and recheck your connections.
If problems persist, consider reaching out to an electrical professional for assistance.

Why USB Outlets Are a Game-Changer for Your Home
USB wall outlets aren’t just trendy—they’re incredibly practical. Here’s why upgrading your home with USB ports is worth the effort:
- Reduce Clutter: No more bulky adapters cluttering your counters or tables.
- Modern Convenience: Quick and easy device charging directly from the outlet.
- Future-Proofed Home: With most devices relying on USB charging, a USB outlet is a smart investment for any modern home.
When to Call the Pros
Now that you know how to install a USB outlet, you can see it’s a manageable project for a DIY homeowner with the right tools and safety measures. That said, not every installation is straightforward. If you’re dealing with old wiring, complex circuits, or just want peace of mind, calling in a professional is always a good idea.
At Genz-Ryan, we specialize in creating safe, functional, and energy-efficient home systems. Whether it’s upgrading your outlets, rewiring a room, or tackling a full electrical project, we bring expertise and care to every job. Give us a call today! We’re here to make your home better, one project at a time.